A comprehensive guide that answers all your questions about deep frying at home. Safely and easily learn how to deep fry your favorite food items for restaurant-quality meals.

One of the most life-changing hacks in my kitchen has been learning to deep fry at home. To replicate that crispy, crackly deep fried texture from restaurants is easier than you think! You don’t need a special deep fryer. Instead, set up a deep frying station with a few multi-functional, basic kitchen items.
Once set up, this routine will make it so easy to make deliciously crispy and crunchy deep-fried foods.
How to deep fry without a deep fryer:
- Set up a deep frying station. You’ll need a cast iron pot, thermometer, tongs, and metal strainer. You’ll also need a wire rack and sheet pan to transfer cooked items and for draining the excess oil.
- Add oil. For deep frying, you’ll need enough oil so the food item can float. Generally, that’s anywhere between 1-2 inches of oil and even up to 4 inches for larger items like bone-in chicken breast. Choose an oil with a high smoke point that’s neutral-tasting and not too expensive. Some good recommendations: avocado oil, grapeseed oil, canola oil, safflower oil, soybean oil, peanut oil, sunflower oil, corn oil, or vegetable oil.
- Batter the food items. Dredge food items in batter. Depending on the recipe, the batter will be wet or dry or a combination of both.
- Deep fry. Generally, deep frying requires a temperature between 350F-370F. Once the thermometer shows the desired temperature, add food. Gently lower in items, making sure not to crowd the pan.
- Drain. Transfer fried food to a wire rack fited over a sheet pan. Enjoy!


Equipment:
- Dutch Oven. A cast iron Dutch Oven is the best deep frying container. Cast iron retains heat well and regulates the heat in a stable manner. The high walls prevent splashing and splatter. It has a deep cavity and makes it easier for food to “swim” in the hot oil. Also, there’s no long handle that can be knocked over (like a wok). In my humble opinion, a Dutch Oven is better than a wok, stainless steel pot, or cast iron skillet. It makes deep frying at home easy, safe, and delicious.
- Thermometer. The key to crispy, deep-fried food that’s not greasy is frying at the right temperature. To keep track of the oil temperature, I recommend a stainless steel candy thermometer (affiliate) or digital candy thermometer (affiliate) that can be clipped to the side of the dutch oven. A candy thermometer is easy to read, gives constant temperature updates, and fits easily on the side of the cooking vessel.
- Stainless Steel Spider Strainer. To safely scoop up hot food items, use a stainless steel Spider Strainer (affiliate). As you scoop, the excess oil will drain back into the pot. A slotted spoon or any fine mesh strainer can also work — but make sure it’s made out of stainless steel as plastic can warp and/or melt in the hot oil.
- Tongs and/or Long Chopsticks. Another important tool for flipping and separating food items that stick together. The longer the tongs/chopsticks, the less likely oil will splash onto your hand. Make sure to use metal tongs, as plastic tongs may warp or melt. Wooden chopsticks are recommended over melamine for the same reason.
- Wire Rack + Sheet Pan. Transfer deep-fried food to a cooling rack fitted over a sheet pan to maintain that crispy, crunchy texture. Air will circulate under the food, so it doesn’t steam and get soggy on the bottom.


Safety Tips:
- Do not leave hot oil unattended. Do not step away from the oil! Hot oil can easily catch fire, especially if left unattended. If the oil starts to smoke or smells burnt, that’s a warning sign. Turn off the heat immediately.
- Do not add water to a grease fire! If the oil catches fire, DO NOT ADD WATER! Adding water to the hot oil can cause extreme splatter and the oil can vaporize into tall flames. The fire can easily spread onto nearby objects.
- Keep a lid nearby. If the oil catches fire, suffocate the flames by covering with a lid. The lack of oxygen will snuff out the flames. Make sure it’s a metal or cast iron lid, as glass will shatter.
- Keep a fire extinguisher nearby. For the ultimate in home cooking safety, purchase a small fire extinguisher and keep it nearby. I’ve never used mine but it does provide reassurance in case of an emergency.
- Do not move the pot. Although it may seem logical to move a burning, smoking pot to a safer location (for example, outside), it’s extremely dangerous. The hot oil can spill and cause severe burns to your arms, as well as splash onto the walls and floors of your home.
- Be careful of oil splatter. When placing food into the oil, be careful. Dropping foods too quickly will result in oil splashes. Instead, carefully and gently lower food items into the oil so there’s no backsplash. Also, make sure to lower food in a direction away from you rather than towards you.
- Cool oil completely. After deep frying, cool the oil completely before storing it. Hot oil can melt plastic containers or shatter glass ones.
- Cool skin under running cold water. If skin comes in contact with splashed oil, immediately place under a faucet with running cold water for 10-15 minutes. Running cold water will remove the heat from the skin and prevent burns and blisters. A method that works well for minor burns.
PRO Tips:
- Allow for temperature drops. Adding cold food to hot oil will result in an initial temperature drop. To maintain regular, even heat — make sure the oil temperature is slightly higher than the required temperature (about 10 degrees F) when adding food. That way, the temperature won’t dip too low.
- Do not overcrowd the pan. Overloading the pot so it’s very full will create a drastic temperature drop, resulting in oily-tasting food. Do not crowd the pan! Instead, fry in multiple batches. The food will fry more quickly with a less greasy finish.
- Remove debris during the cooking process. It’s important to remove the debris that floats to the top of the cooking oil when frying. Otherwise, these small bits can burn and make the oil taste bitter. Use a fine mesh or Spider strainer for this task.
- Add enough oil. Although it’s tempting not to add enough oil, you’ll get a better result when there’s enough oil for the food to be completely submerged. It should “float” in the hot oil for best results.
- Be mindful: oil takes on the flavor of food. When deep frying, remember that oil will absorb food smells and flavors. If frying several food items, fry the sweeter, more neutral-tasting items first. Save the onion rings and pakora for last.
Deep frying vs shallow frying
- Deep frying. There should be enough oil so that food items are completely submerged. They will look like they are “floating” in the hot oil, i.e., “swimming” or “bobbing.” You will need a cooking vessel with a deep cavity and several inches of oil. Ensures maximum crispy and crunchy texture.
- Shallow frying. There should be a thin layer of oil that coats the bottom of the pan. Food items can be fried, one side at a time. Shallow frying allows food to crisp up with a minimal amount of oil. Note: the final texture will not be as crispy and crunchy.

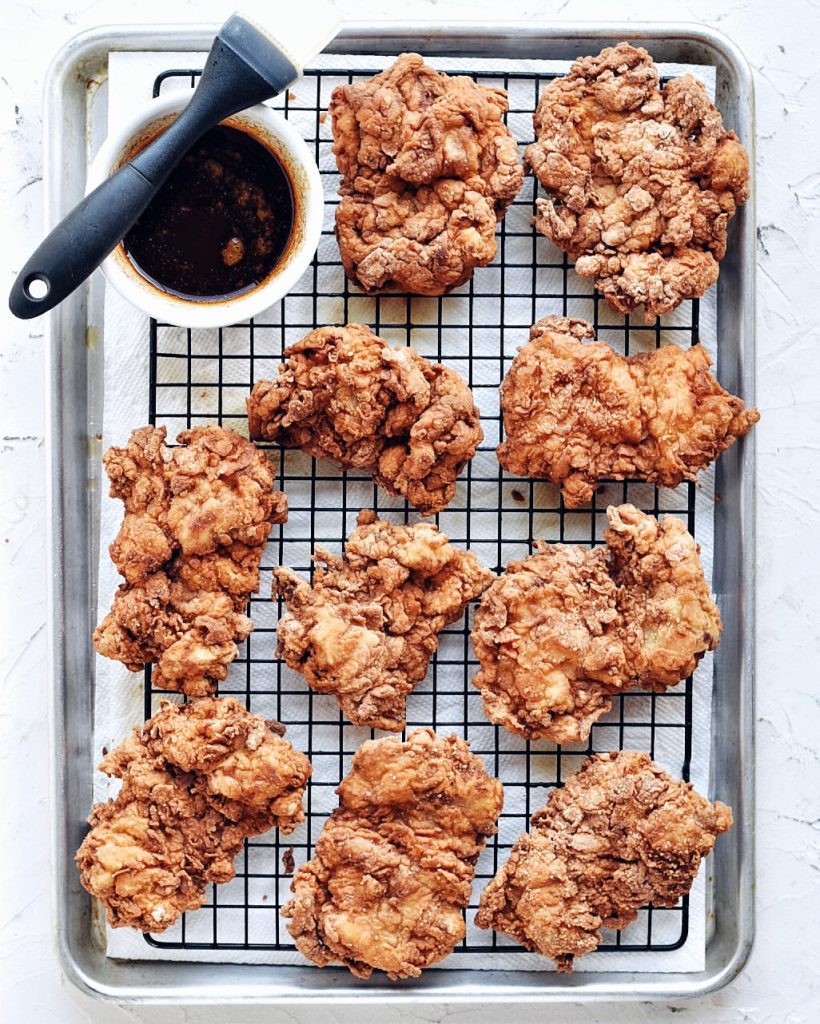
Savory deep-fried inspiration:
- Korean Fried Chicken
- Hawaiian Mochiko Chicken
- Nashville Hot Chicken Sandwich
- Korean Fried Chicken Sandwich with Kimchi Mayo
- Fried Fish Sandwich with Spicy Tartar Sauce
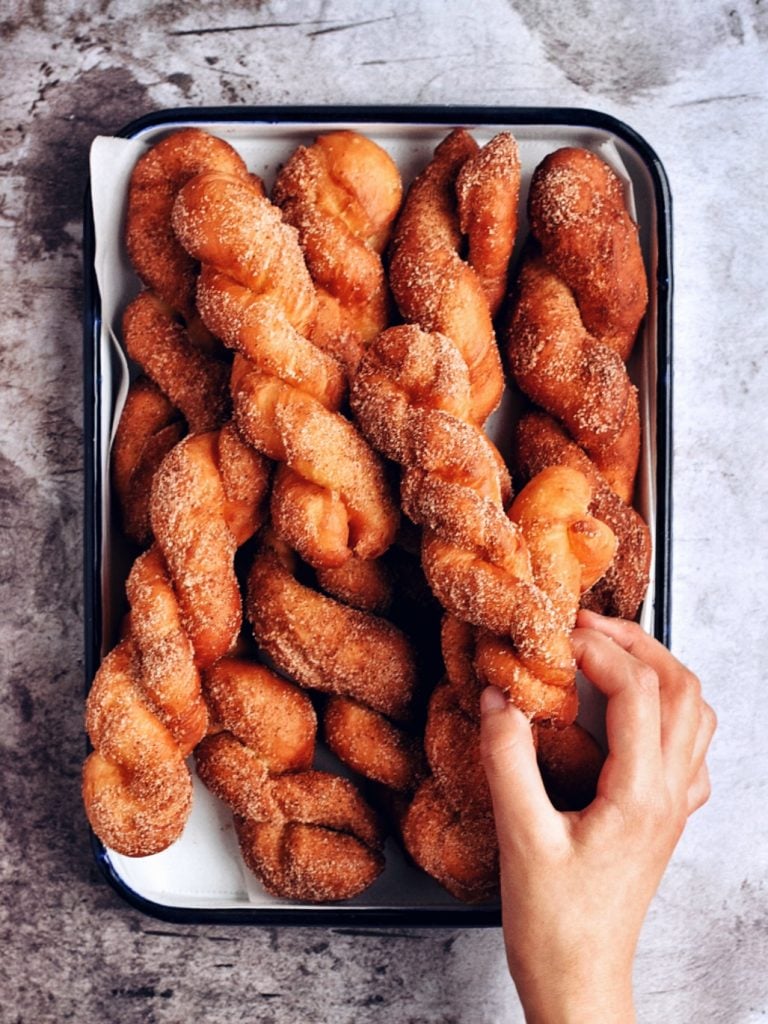
Sweet deep-fried inspiration:
FAQ
Properly deep-fried food should not be greasy. But if your food contains visibly oily spots and soggy batter, those are signs that the oil was not heated properly or that the temperature dipped too low during the cooking process.
For consistently crispy and crunchy results, I recommend investing in a food-safe, stainless steel candy thermometer. Either a digital thermometer (affiliate) or conventional thermometer (affiliate) that clips to the side will work well. And keep an eye on the temperature! Depending on the recipe, most deep-fried foods require a temperature of 350F.
Also, make sure to transfer deep-fried food onto a cooling rack fitted over a sheet pan. Although it’s a common method to transfer deep-fried food to paper towels, I find that setting freshly fried food on top of a flat surface creates pockets of steam that can quickly turn soggy.
The best oil for deep frying contains a high smoke point, which means it can reach a high enough temperature before the oil starts to smoke. The oil should also be neutral-flavored, so the fried food does not take on the flavor of the oil. Lastly, deep frying oil should be inexpensive as you will need a lot of it!
My recommendations: Safflower oil, soybean oil, peanut oil, sunflower oil, grapeseed oil, canola oil, corn oil, and vegetable oil (which is usually a combination of several different high smoke-point oils).
Do not use olive oil, sesame oil, coconut oil, ghee, hempseed oil, or any kind of finishing oil that’s fragrant and minimally refined. They all contain low smoke points and will burn easily, leaving a bitter aftertaste.
Oil can be reused a few times after deep frying. When it becomes too dark and/or cloudy, changes consistency, or smells acrid, it’s best to dispose of the oil.
To store leftover oil, cool completely. Then transfer to a glass jar (or the original oil container) and store in a dark, cool place. Make sure to run the oil through a fine mesh sieve to filter out debris before storing.
To get rid of the oil, pour into a plastic container (like an old yogurt container) and throw away in the garbage. Or, compost by pouring over absorbent food items like bread crusts so it doesn’t pool and leak too much. And make sure to double bag.
Turn off the heat immediately and wait for it to cool. Adding additional oil will also help to lower the temperature.
One of the most common obstacles to deep frying at home is the lingering oily smell that seems to hang in the air, sometimes for days. Some tips to avoid that oily after-smell:
Exhaust fan. Use your exhaust fan! I keep mine running during the cooking process and even 10-15 minutes afterward. A good exhaust fan works wonders at eliminating that oily smell.
Windows. If you don’t have a good exhaust fan, open your windows. Even opening the windows slightly will create air circulation and help to remove that oily smell.
Close closet and bedroom doors. Make sure to close bedroom and closet doors, as cooking smells can waft upwards and outwards from the kitchen. An easy way to block odors from spreading.
Febreeze. A small spray of Febreeze works wonders at dissipating unwanted cooking smells. After cleaning and wiping down the kitchen, I spray a few squirts throughout the kitchen and nearby areas; cooking smells magically disappear. I particularly like the neutral scent of Linen & Sky Febreeze (affiliate).
Candle. An alternative to Febreeze. During the cooking process, keep a candle burning. After dinner, blow it out. A candle helps to absorb cooking smells. The candle can be scented or unscented.
A simmering pot of lemon slices + cinnamon sticks. A natural way to eliminate cooking smells in the house. Fill a stock pot halfway with water and add 2 sliced lemons and 2 cinnamon sticks. Simmer on low heat for 20 minutes.
